Introduction To Interleave

About this Event
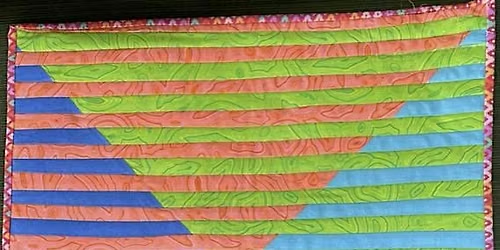
During class, most students will create an eye-catching wall-hanging, finished size
16″ x 16″.
Upon completion, we will discuss several “finishing” options and techniques. Since there are so many interleave variations, I’ll bring a variety of samples and we’ll spend time discussing how to design and construct these alternatives.
Instructor: Suzanne Worrall
Supply List:
Following is a supply list for a 16″ x 16″ wall hanging.
• Sewing machine in good working order, fresh needle and all the stuff you normally use. We’ll be sewing through several thicknesses: some folks prefer a walking foot, although I do not. However, machines vary.
• Interleave Front: 4 Fat Quarters, different colors. If you look at the sample, you’ll see it’s almost an “eye test”! Generally contrasting solid colors ( or those that “read” solid) work well. However, lots of combinations are surprising! Don’t overthink your first project.
• Backing: Fat Quarter: cut 20″ x 20″.
• 1/2 yard fusible Quilters Grid, cut 20″ x 20″. This is usually marked with 1″ squares but the 2″ type also works fine. If you don’t bring it, I’ve got a supply of the 1″ grid Pellon fusible which I’ll bring to class and sell at $5.00/yard.
• Cotton (80/20) Batting, cut 20″ x 20″
Misc. Supplies:
• Marker/Sharpie Pencil. 24″ ruler, rotary cutter with a sharp blade. Mat at your sewing machine. Large mats will be available but smaller ones will save a lot of getting up and down.
• Wooden seam presser for finger/hand pressing at your seat. A couple of irons and boards will be provided.
Where is it happening?
Event Location & Nearby Stays:
USD 49.87 to USD 71.21